

Why Everyone Needs a Quick and Simple Chocolate Bread Recipe
In a world where time feels scarce, baking often seems like a luxury. However, with this quick and simple chocolate bread recipe, indulgence becomes accessible. It’s a delightful blend of ease and decadence, perfect for when you crave something sweet but don’t want to spend hours in the kitchen. Whether it’s a sudden dessert emergency or a treat to accompany your coffee, this recipe has got you covered.
Table of Contents
The Perfect Recipe for Beginners and Busy Schedules
This chocolate bread recipe is a game-changer for those new to baking or juggling packed schedules. It’s simple, quick, and utterly delicious, making it ideal for beginners and busy bees alike. With minimal preparation and easy-to-follow steps, you can create a decadent loaf that looks and tastes impressive. The combination of pantry staples and rich cocoa transforms ordinary ingredients into something extraordinary. Whether you’re baking for yourself or hosting last-minute guests, this chocolate bread recipe delivers results that never fail to impress. It’s the perfect balance of convenience and indulgence, proving that great baking doesn’t have to be complicated.
A Sneak Peek at What Makes This Recipe a Must-Try
Prepare to be captivated by the irresistible allure of this recipe. What makes it a must-try is the decadent burst of chocolate flavor in every bite, paired with a moist, tender crumb that feels like pure indulgence. Crafted with simplicity in mind, this recipe balances ease and elegance, allowing anyone to create bakery-worthy results. The richness of chocolate elevates the loaf, making it a versatile treat—perfect for breakfast, dessert, or an afternoon pick-me-up. Whether shared with loved ones or enjoyed solo, this creation is a testament to the magic of chocolate in transforming simple ingredients into a masterpiece.
Gather Your Ingredients and Tools
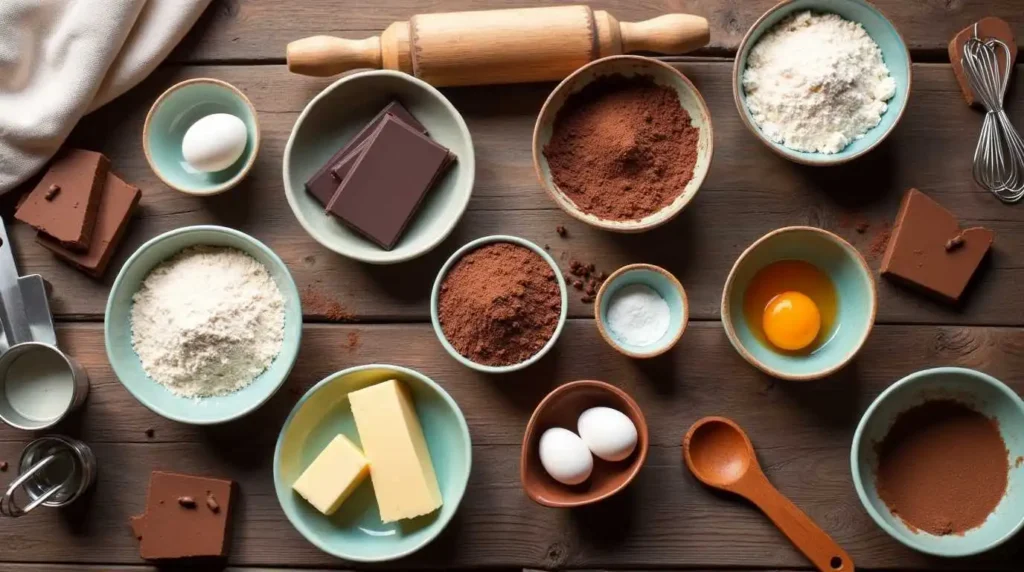
Essential Ingredients for a Quick and Simple Chocolate Bread
You’ll need a handful of pantry staples, including all-purpose flour, cocoa powder, sugar, eggs, butter, milk, and baking powder. Chocolate chips or chunks add richness, while a pinch of salt enhances the overall flavor. These ingredients come together to create a harmonious balance of sweetness and depth.
Substitutes for Common Ingredients You Might Already Have
If you’re missing an ingredient, fear not. Substitute regular milk with almond or oat milk to make a dairy-free alternative. Use coconut oil in place of butter for a unique flavor twist. Whole wheat flour can replace part of the all-purpose flour for a heartier loaf, and you can substitute honey or maple syrup for sugar to create a slightly healthier option.
Tools to Make Your Baking Process Hassle-Free
To ensure a smooth baking experience, gather a mixing bowl, a whisk, a spatula, and a loaf pan. A sifter for dry ingredients and a parchment liner for the pan are optional but helpful. A cooling rack will allow your bread to cool evenly, enhancing its texture.
Preparing the Recipe Step by Step
How to Quickly Prep Your Ingredients for Smooth Baking
Start by measuring out all your ingredients. Sift the dry ingredients flour, cocoa powder, baking powder, and salt into a bowl to remove lumps. Melt the butter and let it sit for a moment to cool slightly. This step ensures you can work quickly and efficiently without interruptions.
Mixing the Wet and Dry Ingredients Without the Mess
Combine the wet ingredients—eggs, milk, melted butter, and sugar—in a separate bowl. Whisk until smooth. Use a spatula to gently incorporate the dry ingredients into the mixture. This method minimizes mess and helps achieve a smooth batter without overmixing.
How to Achieve the Ideal Batter Consistency.
The batter should be thick but pourable. If it feels too dense, add a splash of milk. For a creamier texture, stir in chocolate chips or chunks at this stage. Ensure no dry streaks remain, but avoid overworking the batter to keep the bread light and tender.
Baking the Chocolate Bread
Setting the Right Oven Temperature for Even Baking
Preheat your oven to 350°F (175°C). This temperature ensures the bread bakes evenly without drying out. An accurate oven thermometer can help you avoid mishaps.
How to Prepare Your Baking Pan for Easy Cleanup
Grease your loaf pan with butter or cooking spray, then line it with parchment paper. This step prevents sticking and makes removing the bread effortless.
Timing Tips to Avoid Overbaking or Undercooking
Bake the bread for 45–50 minutes. Check for doneness by inserting a toothpick into the center; if it comes out clean or with a few moist crumbs, it’s ready. Refrain from frequently opening the oven door, as it may lead to uneven baking.

Finishing Touches and Serving Ideas
Letting Your Chocolate Bread Cool for Maximum Flavor
Allow the bread to rest in the pan for approximately 10 minutes before moving it to a wire rack to cool completely. This brief resting period helps set the structure while keeping it moist.
Creative Toppings and Pairings to Elevate Your Bread
Dust the top with powdered sugar, drizzle with chocolate ganache, or add a sprinkle of sea salt for a gourmet touch. Pair slices with whipped cream, fresh berries, or a scoop of vanilla ice cream for a decadent treat.
How to Present Your Chocolate Bread Like a Pro
Slice the bread neatly using a serrated knife. Arrange the slices on a platter, garnish with a few chocolate shavings, and serve alongside a steaming pot of coffee or tea.
Tips for Customizing Your Recipe
Adding Nuts, Fruits, or Spices for a Personal Touch
Fold in chopped walnuts, pecans, or dried fruits like cranberries for added texture and flavor. A dash of cinnamon or vanilla extract can elevate the bread’s aroma.
Making It Healthier with Simple Ingredient Swaps
Replace half the sugar with a natural sweetener like coconut sugar. Incorporate whole-grain flour or add a spoonful of Greek yogurt for added nutrients.
Turning This Recipe into Muffins or Mini Loaves
Pour the batter into muffin tins or small loaf pans. Adjust the baking time to 20–25 minutes, testing for doneness with a toothpick.
Storing and Reheating Your Chocolate Bread
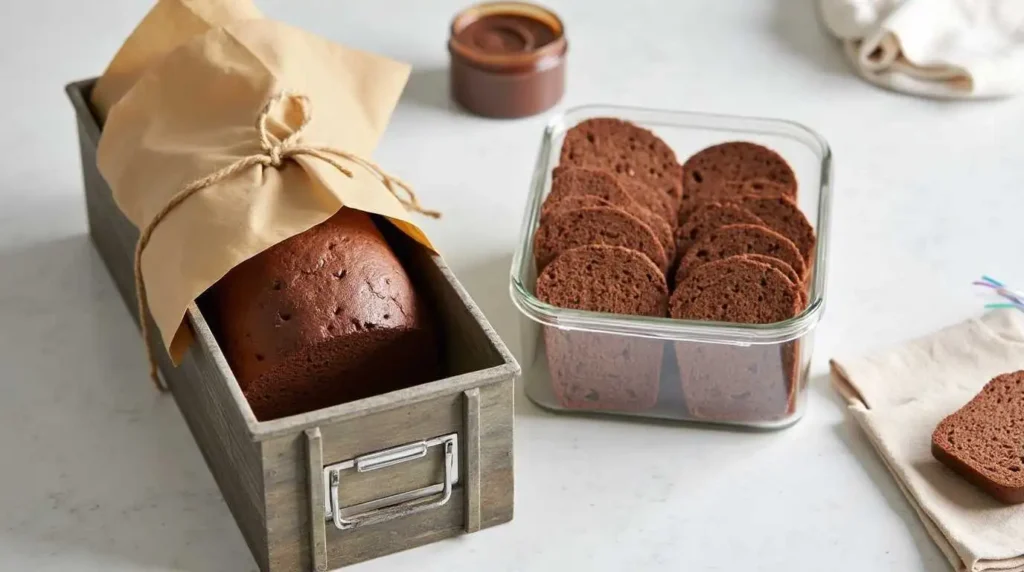
The Best Ways to Keep Your Bread Fresh and Moist
Wrap the bread tightly in plastic wrap or store it in an airtight container. Keep it at room temperature for up to three days or refrigerate it for a longer shelf life.
How to Freeze Chocolate Bread for Future Enjoyment
Slice the bread and wrap each piece individually before placing it in a freezer bag. This approach lets you defrost only the amount you require.
Reheating Tips to Keep That Just-Baked Flavor
Warm individual slices in the microwave for 15–20 seconds or in the oven at 300°F (150°C) for a few minutes. This brings back the bread’s soft texture and rich flavor.
Conclusion
Recap of the Quick and Simple Chocolate Bread Recipe
This recipe proves that delicious baking doesn’t have to be complicated. With minimal ingredients and a straightforward process, you can create a rich, moist chocolate bread that’s sure to impress.
Encouragement to Share Your Baking Experience
Try this recipe today and share the joy with family and friends. Whether it’s a weekday snack or a weekend treat, it’s bound to be a hit.
Invitation to Explore More Quick and Delicious Recipes
Looking for more easy and tasty ideas? Dive into a world of baking possibilities and discover recipes that combine convenience with unforgettable flavors.